In case you’ve required to install unsigned drivers and you need to disable driver signature check on your PC here’s a short guide on how to do that.
Advertisement
[Guide] Disable Driver Signature Enforcement on Windows
Disable Driver Signature Enforcement on Windows 10/8 using additional Startup Settings
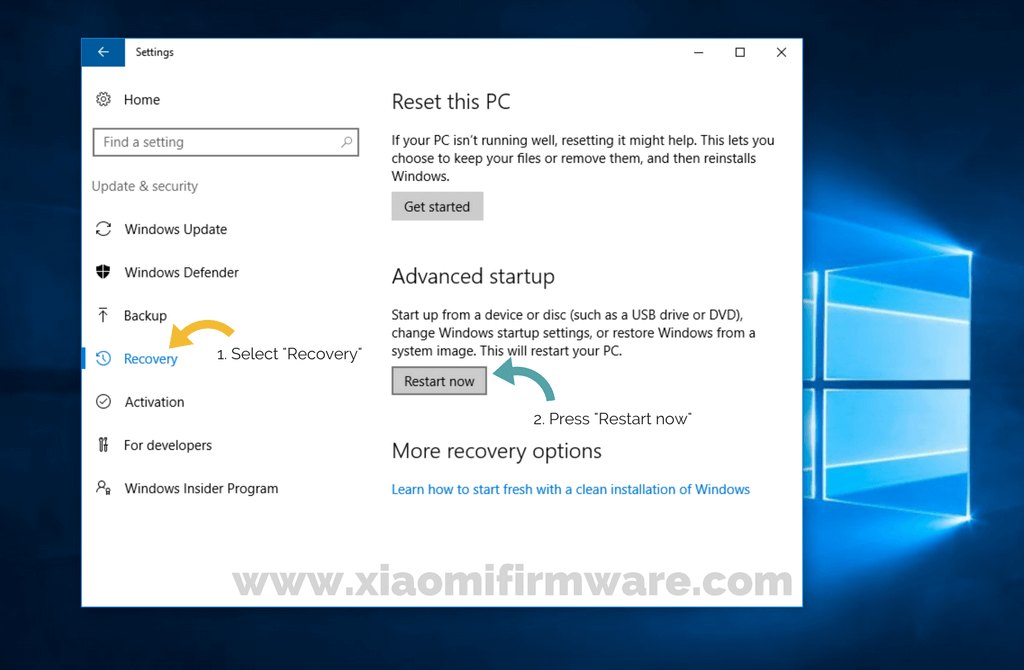
- Go to “Setting” > “Update and Security“.
- Select “Recovery” on the left side menu and press “Restart now” below “Advanced startup”.
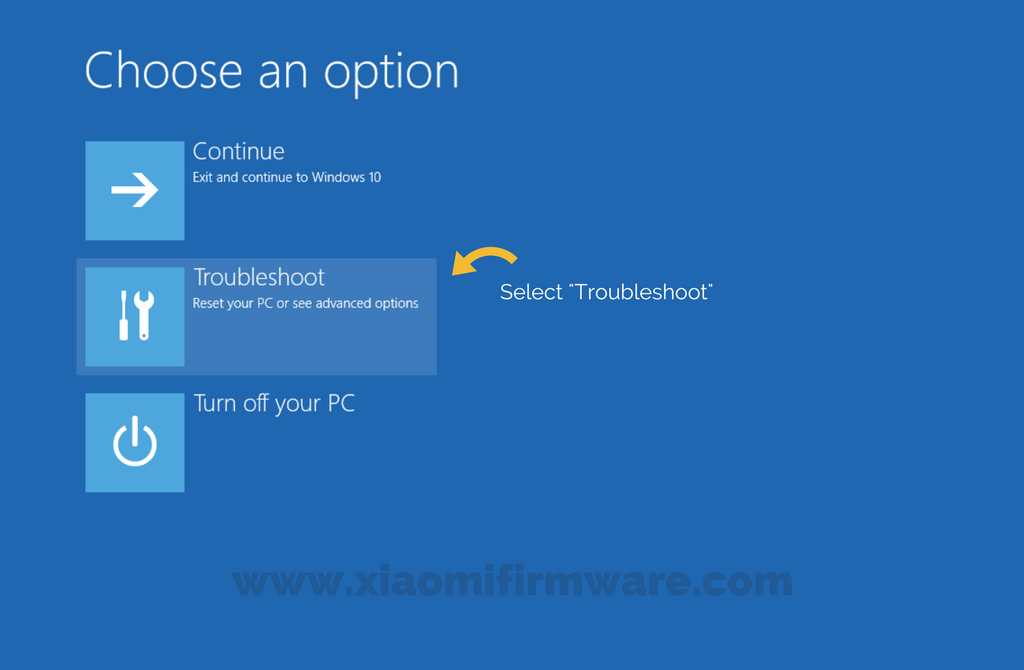
- Your PC will reboot and your should see this screen. Using arrow keys select “Troubleshoot” and press enter.
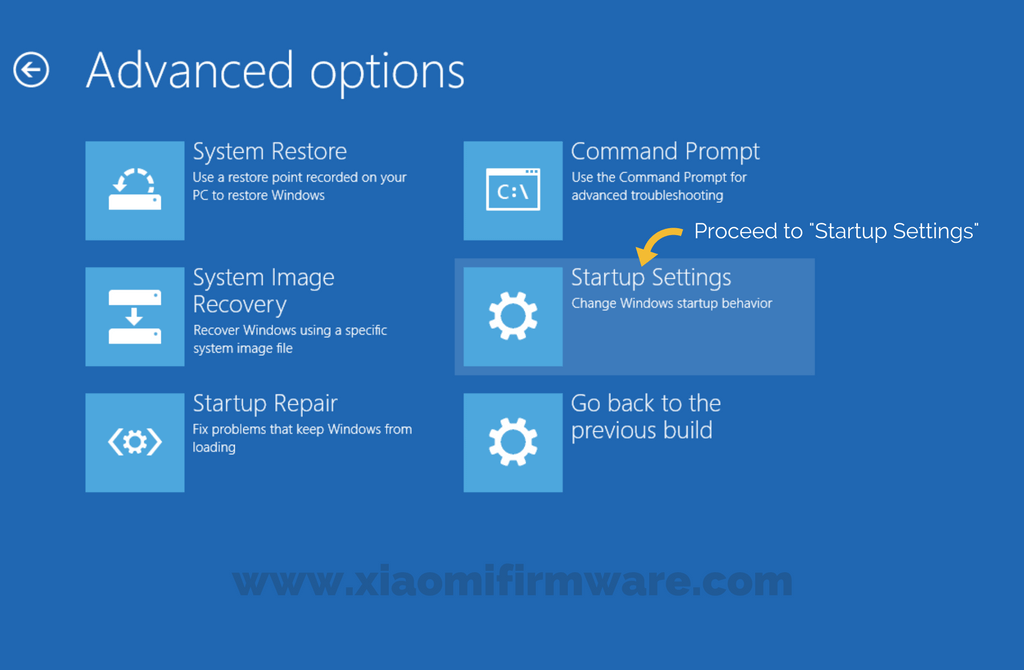
- Select “Advanced options”.
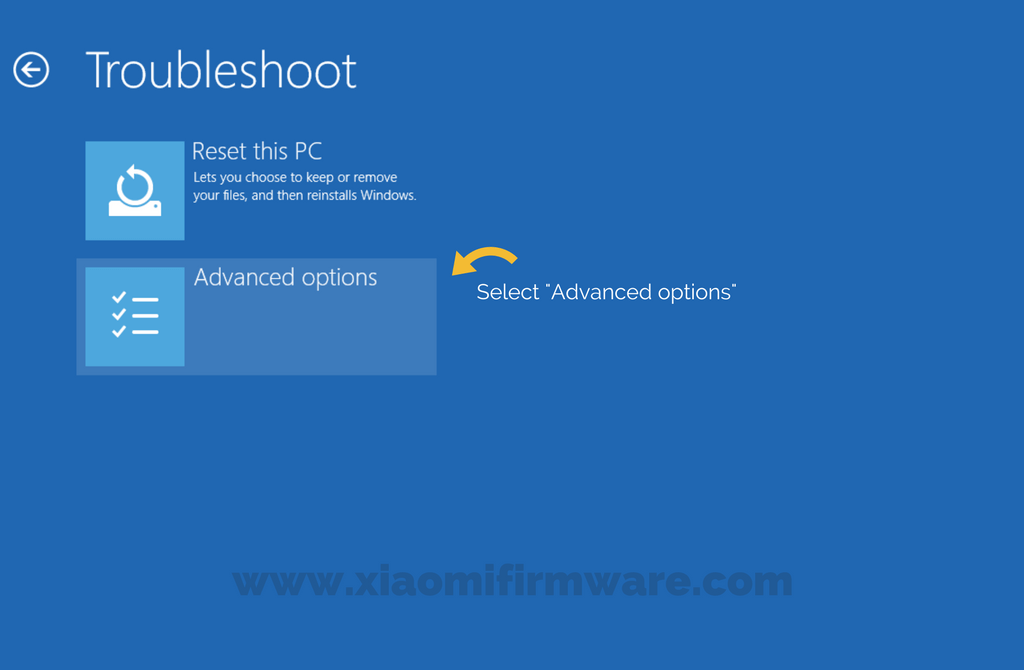
- Now proceed to “Startup settings”.
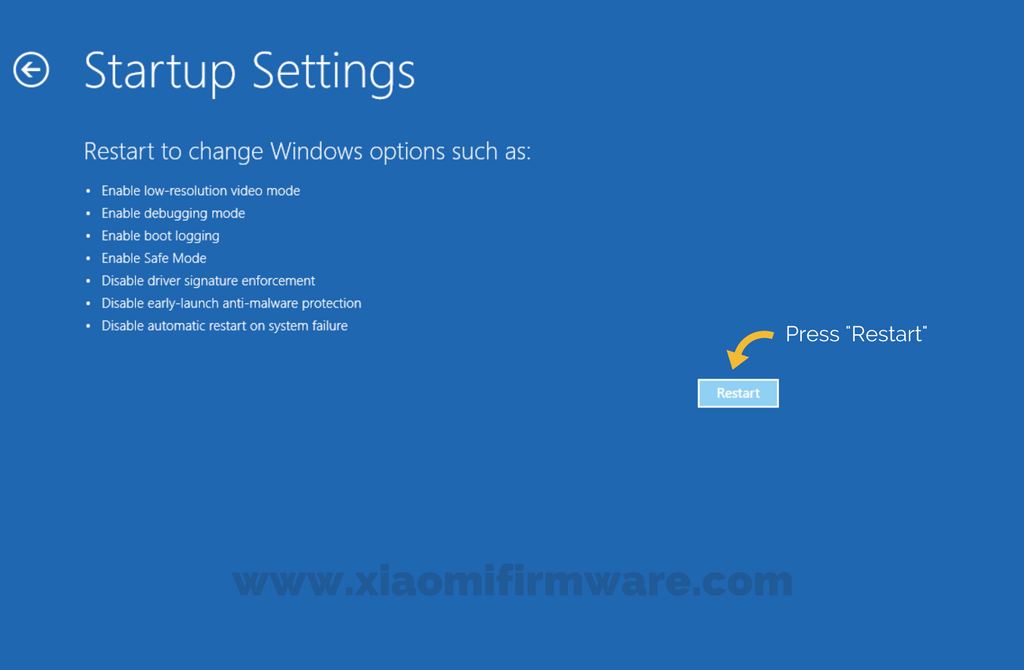
- Press “Restart” and wait until your PC restart.
- Now you should see “Startup Settings”. Press F7 to “Disable Driver Signature Enforcement”.
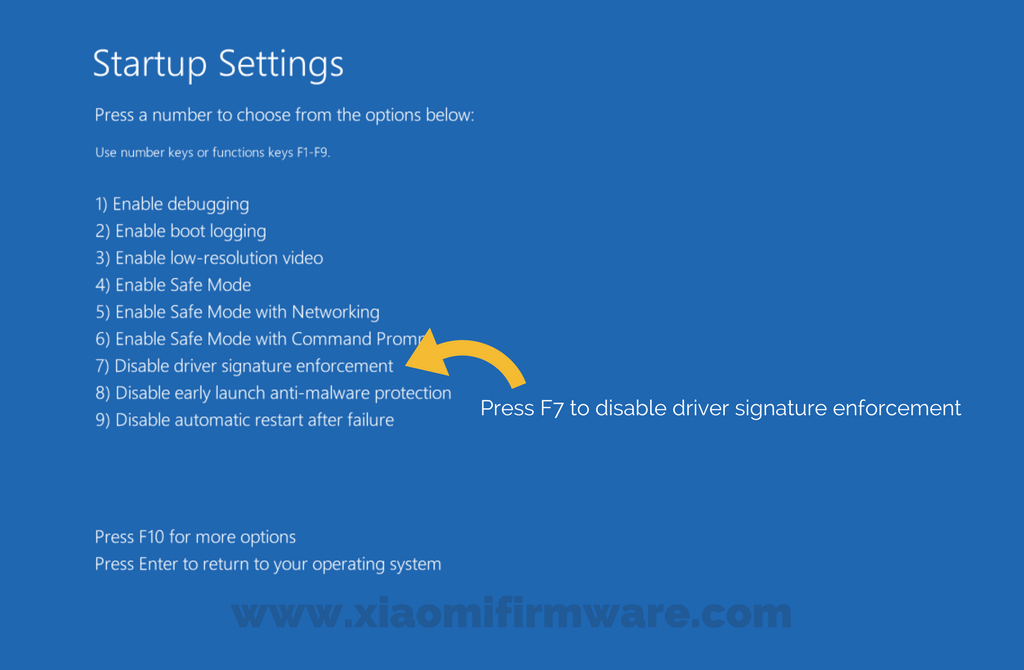
- After system restart you can install any unsigned driver.
Disable Driver Signature Enforcement on Windows 10/8 with Local Group Policy Editor
The second method on how to disable driver signature enforcement is use “Local Group Policy Editor” app. To do this follow these steps below:
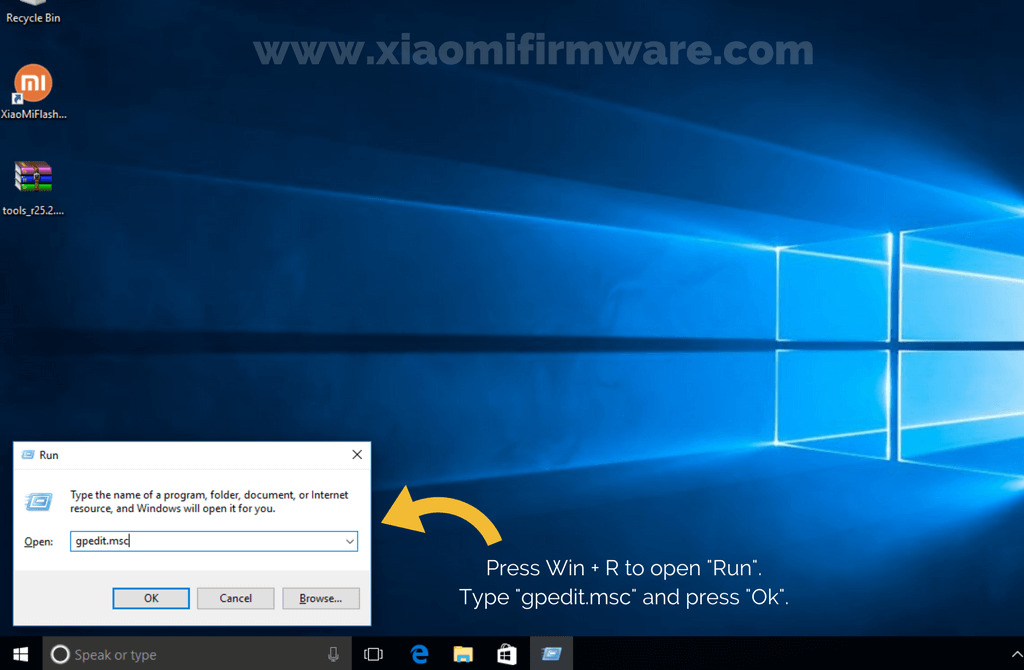
- Press Win + R to open “Run”.
- Type “gpedit.msc” and press “Ok”.
- Open “User Configuration” > “Administrative templates” > “System” > “Driver Installation” > right click on “Code signing for device drivers” and select “Edit”.
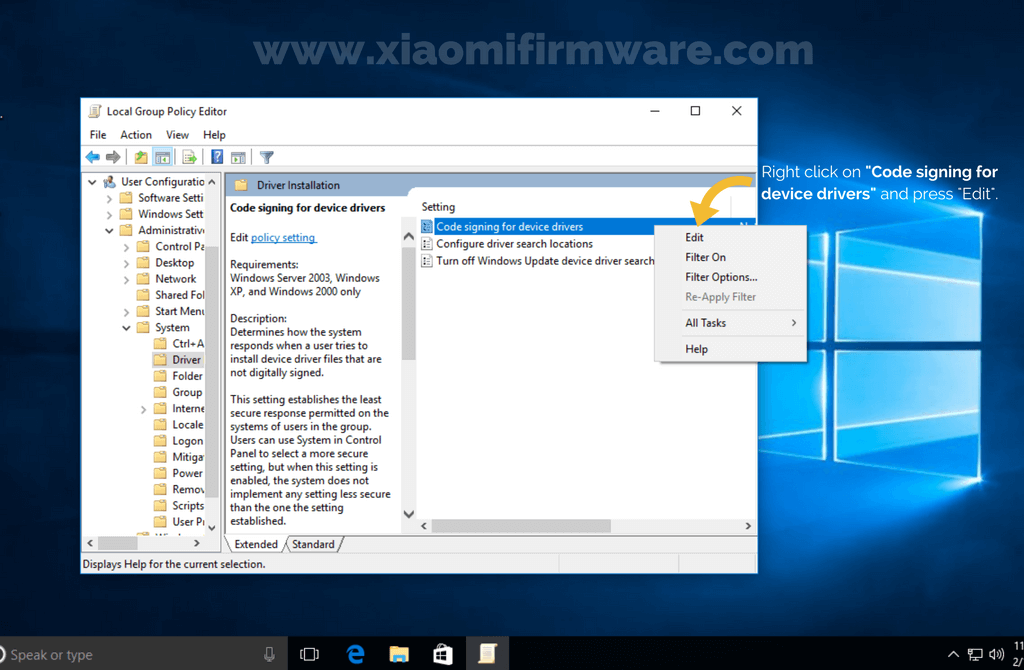
- Select “Enable” and in “When Windows detects a driver file without a digital signature” select “Ignore”.
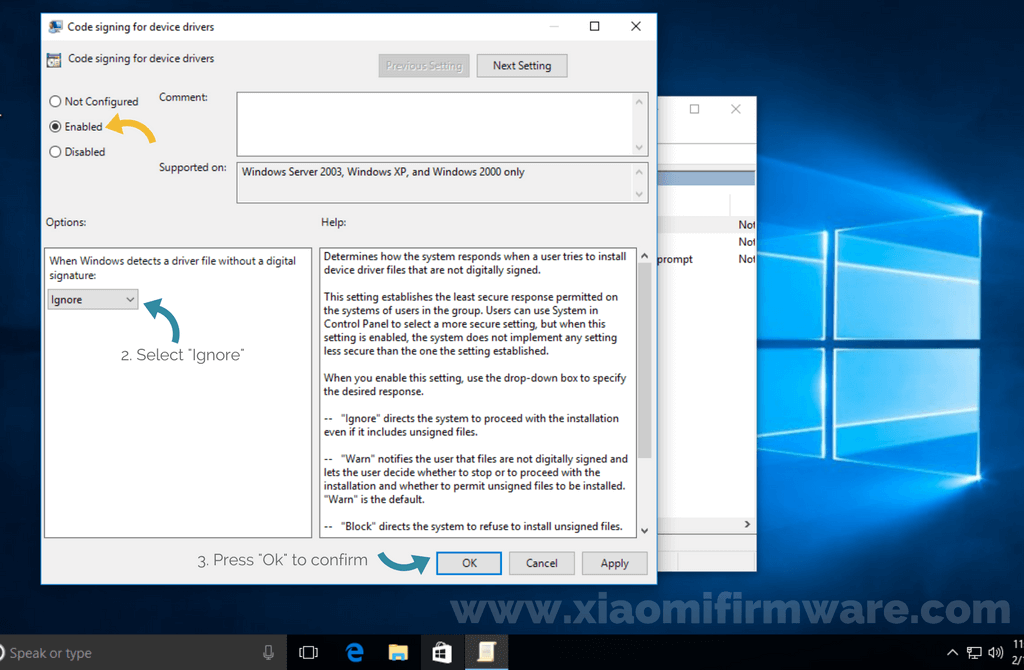
- Press “Ok” to confirm. Now you can close “Local Group Policy Editor” and continue to install required drivers.
Disable Driver Signature Enforcement on Windows 7
On Windows 7 you can disable driver signature enforcement by holding F8 button on system startup and selecting “Disable Driver Signature Enforcement” option in boot menu.

